21、ElasticSearch 实战:ElasticSearch Windows 集群部署
Windows 集群安装
在实践中ES服务为了高可用,一般读会采用集群的方式进行部署。下面在windows环境中测试集权部署,其实ES是java编写的也是可以跨平台运行。所以在Linux中部署也是类似的。
基本环境准备
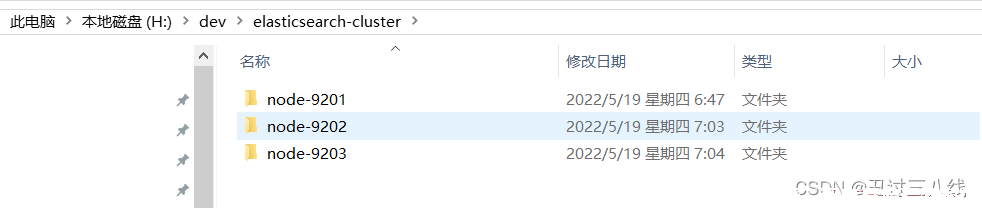
首先创建一个elasticsearch-cluster文件夹,在文件夹中复制3个es服务。分别为node-9201,node-9202,node-9201.如下图:
配置节点9201
1、 首先修改node-9201节点配置文件config/elasticsearch.yml配置文件;
- 配置集群应用名称
cluster.name,这个必须集群中所有节点的名称配置为一致,这里就直接用my-application. - 配置节点名称
node.name,这里配置为node-9201. - 配置节点是否可以作为主节点,
node.master。这里将其配置为可以做为主节点,node.master: true。 - 配置节点是否可以作为数据节点
node.data。这里也将其配置为可以做为数据节点,node.data: true。 - 配置网络监听的
IP,这里可以直接配置为localhost, 配置结果为:network.host: localhost。 这个配置项不配置应该就是监听所有IP。 - 配置网络监听的端口,
http.port,这里将其配置为9201,默认是9200。这个就是restful api的监听端口。 - 配置节点间通讯的端口
transport.tcp.port,配置为9301。默认是9300。 - 增加可跨域的配置
http.cors.enable:true和http.cors.allow-origin: "*"。这些配置应该是和集群没关系的。 2、 配置完后得到的最后的结果为;
cluster.name: my-application
node.name: node-9201
node.master: true
node.data: true
network.host: localhost
http.port: 9201
transport.tcp.port: 9301

# 跨域配置
http.cors.enabled: true
http.cors.allow-origin: "*"
1、 启动node-9201启动的日志可以看到有了节点名称,集权名称,以及他所发布的通信地址的输出日志;
[2022-05-19T21:16:33,608][INFO ][o.e.n.Node               ] [node-9201] node name [node-9201], node ID [5H3KIUIuTyqaFcc3pNoWAA], cluster name [my-application]
......
publish_address {

     localhost/127.0.0.1:9301}, bound_addresses {

     127.0.0.1:9301}, {

     [::1]:9301}
1、 使用PostMan测试集群的健康状态restfulapi地址为http://localhost:9201/_cluster/health测试结果如下:;
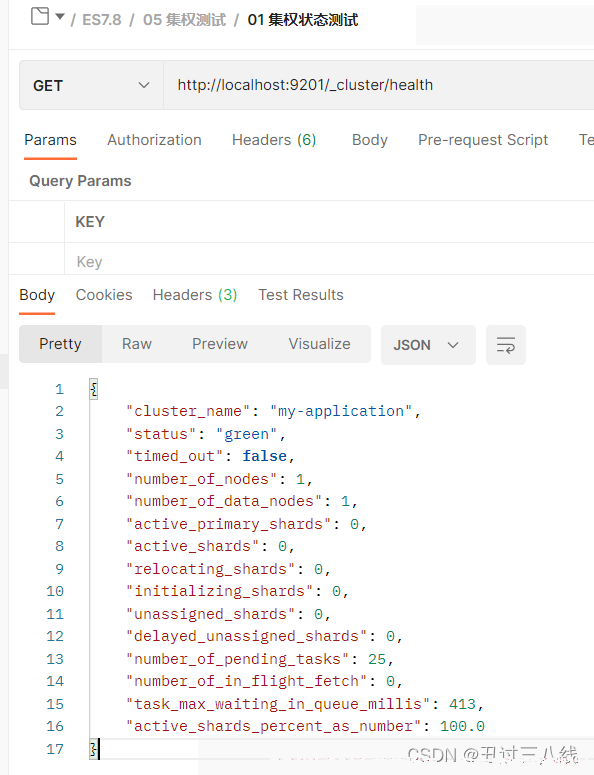
返回的结果内容为
{


    "cluster_name": "my-application",
    "status": "green",
    "timed_out": false,
    "number_of_nodes": 1,
    "number_of_data_nodes": 1,
    "active_primary_shards": 0,
    "active_shards": 0,
    "relocating_shards": 0,
    "initializing_shards": 0,
    "unassigned_shards": 0,
    "delayed_unassigned_shards": 0,
    "number_of_pending_tasks": 25,
    "number_of_in_flight_fetch": 0,
    "task_max_waiting_in_queue_millis": 413,
    "active_shards_percent_as_number": 100.0
}
可从上看到核心信息, status为green,也就是OK的。集群节点数number_of_nodes,数据节点数目number_of_data_nodes,目前都是一个1。因为我们只启用了一个节点。
配置节点9202
配置节点9201之后配置9202就比较简单了, 其他配置都类似. 相对而言不一致的就是:
1、 节点名称node.name:node-9202.;
2、 http端口9202,http.port:9202;
3、 节点间通讯端口9302,配置为:transport.tcp.port:9302;
另外需要增加节点发现的配置。
1、 配置可以发现的主机,这个时候已经有9201了,所以配置让他去发现9201,配置为discovery.seed_hosts:["localhost:9301"];
2、 发现超时时长配置discovery.zen.fd.ping_timeout:1m;
3、 发现重试次数,discovery.zen.fd.ping_retries:5;
综上,最后的配置内容如下:
cluster.name: my-application
node.name: node-9202
node.master: true
node.data: true
network.host: localhost
http.port: 9202
transport.tcp.port: 9302

# --------------------------------- Discovery ----------------------------------
discovery.seed_hosts: ["localhost:9301"]
discovery.zen.fd.ping_timeout: 1m
discovery.zen.fd.ping_retries: 5

# 跨域配置
http.cors.enabled: true
http.cors.allow-origin: "*"
继续启动节点9202。等启动完成之后,再检测集群的健康状态。
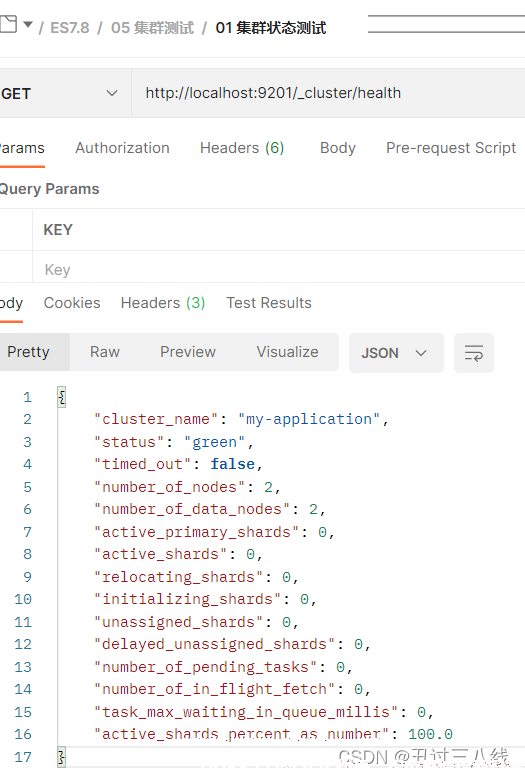
可从上看到核心信息, status为green,也就是OK的。集群节点数number_of_nodes,数据节点数目number_of_data_nodes,目前变为了2。因为我们已经启动了2个节点了。
配置节点9203
与前两个节点类似,我们也要修改节点名称相应的端口:
1、 节点名称node.name:node-9203.;
2、 http端口9202,http.port:9203;
3、 节点间通讯端口9303,配置为:transport.tcp.port:9303;
另外需要增加节点发现的配置。
1、 配置可以发现的主机,这个时候已经有9201和9202了,所以配置让他去发现9201和9202,注意这里用到的端口为内部通信端口,配置为discovery.seed_hosts:["localhost:9301","localhost:9302"];
2、 发现超时时长配置discovery.zen.fd.ping_timeout:1m;
3、 发现重试次数,discovery.zen.fd.ping_retries:5;
综上,最后的配置内容如下:
cluster.name: my-application
node.name: node-9202
node.master: true
node.data: true
network.host: localhost
http.port: 9202
transport.tcp.port: 9302

# --------------------------------- Discovery ----------------------------------
discovery.seed_hosts: ["localhost:9301","localhost:9302"]
discovery.zen.fd.ping_timeout: 1m
discovery.zen.fd.ping_retries: 5

# 跨域配置
http.cors.enabled: true
http.cors.allow-origin: "*"
启动node-9203,等待其已经完全启动之后再使用postman检测健康状态。
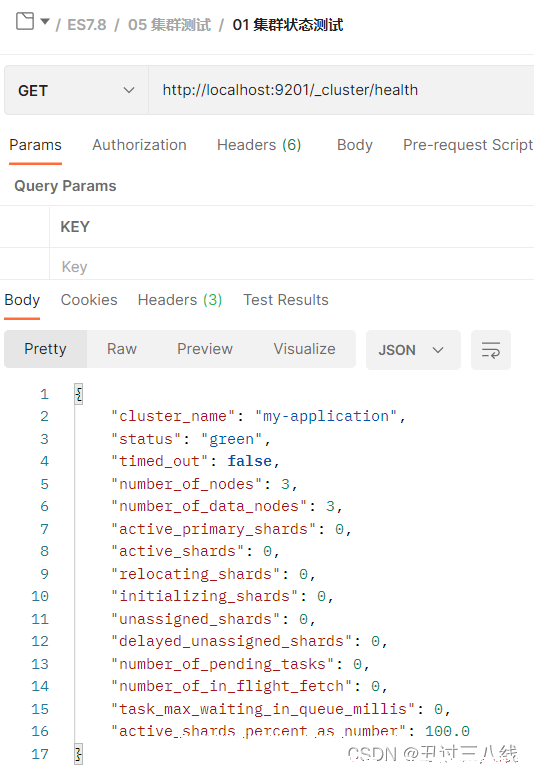
可从上看到核心信息, status为green,也就是OK的。集群节点数number_of_nodes,数据节点数目number_of_data_nodes,目前变为了3。因为我们已经启动了3个节点了。
注意事项
如果在启动的时候各节点无法进行发现和注册,这个时候可能是节点中有以前运行的数据,需要将data和log两个文件夹删除,然后重启就OK了。
当3个节点都正常运行的时候,健康状态检测的URL.连向3个节点一样。
1、 http://localhost:9201/_cluster/health;
2、 http://localhost:9202/_cluster/health;
3、 http://localhost:9203/_cluster/health;
经过测试,在这样的集群配置下,要是node-9201挂了之后就无法请求了。这个问题在后续再测试下。